Download and Install the Buzzer Module Library for Proteus Software for Simulation
Proteus software is a powerful tool for electrical engineers, allowing them to design and simulate circuits efficiently. One of its strengths is the ability to integrate various component libraries, including sensors, modules, and microcontrollers. If you are working on a project that involves sound-based alerts or notifications, adding a Buzzer Module Library to Proteus is essential.
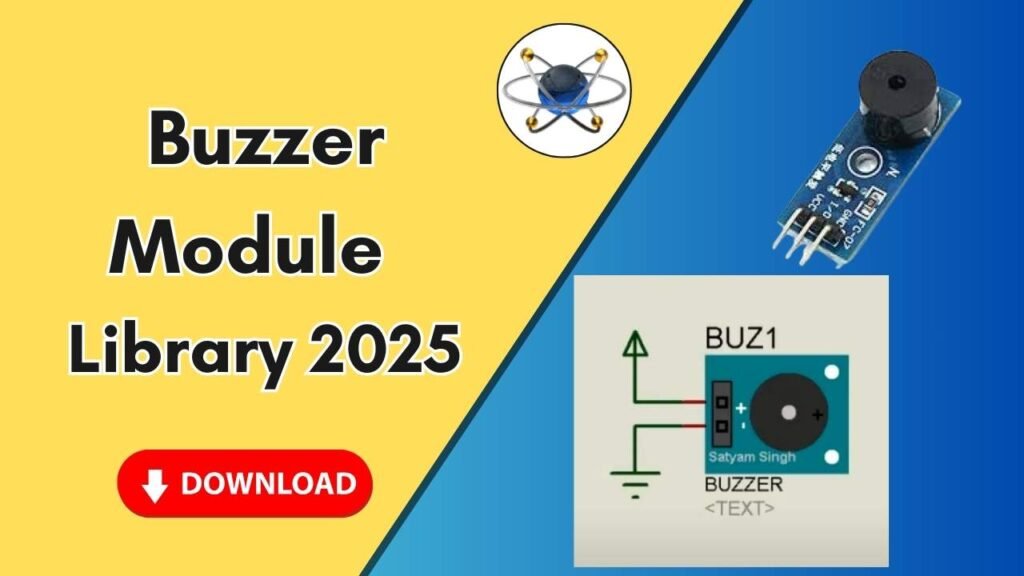
This guide will walk you through the step-by-step process of downloading, installing, and using the Buzzer Module Library in Proteus for accurate circuit simulations. Follow along to enhance your design capabilities and streamline your development process.
Step-by-Step Guide to Adding the Buzzer Module Library to Proteus
Step 1: Download the Buzzer Module Library
Before adding the buzzer module to Proteus, you first need to download the necessary library files. These files typically include:
- .IDX File – Contains indexing information.
- .LIB File – Holds the library components.
- .HEX File (if applicable) – Used for microcontroller-based simulations.
You can download the buzzer module library from the button below. Once downloaded, extract the files if they are in a compressed format (such as ZIP or RAR).
Step 2: Locate the Proteus Installation Folder
Now that you have the required files, the next step is to add them to the Proteus library folder.
- Navigate to Your Proteus Installation Directory:
- Locate the Proteus shortcut icon on your desktop.
- Right-click on it and select Open File Location.
- This will take you to the Proteus installation folder.
- Access the Library Folder:
- In the installation directory, go back one step to the main Proteus folder.
- Look for a folder named LIBRARY.
- Open this folder, as this is where you need to place the downloaded library files.
Step 3: Copy and Paste the Buzzer Library Files
- Copy all the downloaded .IDX, .LIB, and any additional files.
- Paste them into the LIBRARY folder inside the Proteus installation directory.
- If you receive a prompt that a file already exists, choose Skip for any duplicate license files.
Step 4: Restart Proteus Software
For the new buzzer module to appear in the component list, you need to restart Proteus:
- If Proteus is currently open, close it completely.
- Reopen Proteus after a few seconds to allow it to reload the libraries.
Step 5: Locate and Add the Buzzer Module in Proteus
- Open Proteus and Search for the Buzzer:
- Click on P (Pick Devices) in the component menu.
- In the search bar, type Buzzer.
- You should see the buzzer module listed.
- Select it and click OK.
- Place the Buzzer in the Workspace:
- Drag and drop the buzzer onto your schematic workspace.
- Now, you can connect it to your circuit design.
Step 6: Connecting and Simulating the Buzzer in Proteus
Once you have added the buzzer module, follow these steps to simulate its functionality:
- Connect the Power Supply:
- Pick a 5V Power Source from the components list.
- Connect the positive terminal of the power source to the positive pin of the buzzer.
- Connect the negative terminal of the power source to the negative pin of the buzzer.
- Adjust Buzzer Properties:
- Right-click on the buzzer module and select Edit Properties.
- You will see that it is set as a 5V buzzer by default, but you can modify this value based on your simulation needs.
- Run the Simulation:
- Click on the Play (Run) button to start the simulation.
- You should now hear the buzzer sound when the circuit is powered.
- Stop and restart the simulation to test different scenarios.
Troubleshooting Tips
If the buzzer module does not appear in Proteus or fails to function correctly, try the following solutions:
- Ensure the files are correctly placed in the LIBRARY folder.
- Restart Proteus after adding new library files.
- Check component connections in your schematic.
- Confirm power supply settings match the buzzer’s voltage requirements.
Conclusion
Adding a Buzzer Module Library to Proteus is a simple yet crucial step for designing circuits that involve sound notifications. By following this guide, you can effortlessly integrate and simulate a buzzer module in your Proteus workspace. Whether you are designing alarms, timers, or feedback systems, this module will enhance your circuit simulations.
For more in-depth tutorials and simulation guides, be sure to visit our website and YouTube channel. Happy designing!



2 Comments